16 January 2017
Some notes and observations about a Warmoth medium scale bass build. The opinions expressed are my own; use at your own risk. Please do not copy and repost these photographs or link directly to them from my server.
After getting my Kubicki Ex Factor back and finally understanding that the 32" scale was mostly responsible for the way it seemed to suit my hands I decided on my next bass. I wanted a PJ pickup configuration next so a medium scale PJ seemed like a natural step.
At the beginning of 2015 it seemed like exactly that was available from Fender Japan in form of the Aerodyne Jazz Bass. But a lack of funds meant that I had to put off the purchase. By the time I had the money the supply had dried up so I went looking for other ways to fulfil my dream. Following a business trip to Japan in late 2016 I checked several stores in Tokyo as well as many music stores in smaller regional cities pestering them for medium scale basses. Most of the time they would point me to Gibsons, technically short scale instruments. Although it would end up considerably more expensive in the end I decided to put one together with Warmoth parts.
Sometimes it's the little details that make an instrument something you pick up more often than another. My CIJ Fender Jazz has a light basswood body with an organic, woody tone and so gets played often. My Ibanez SR705 is heavy, but has an incredibly thin neck and a tone that I'd describe as "pure" coupled with a versatile EQ. It's a bass that I've only recently bonded with despite having owned it for a number of years now.
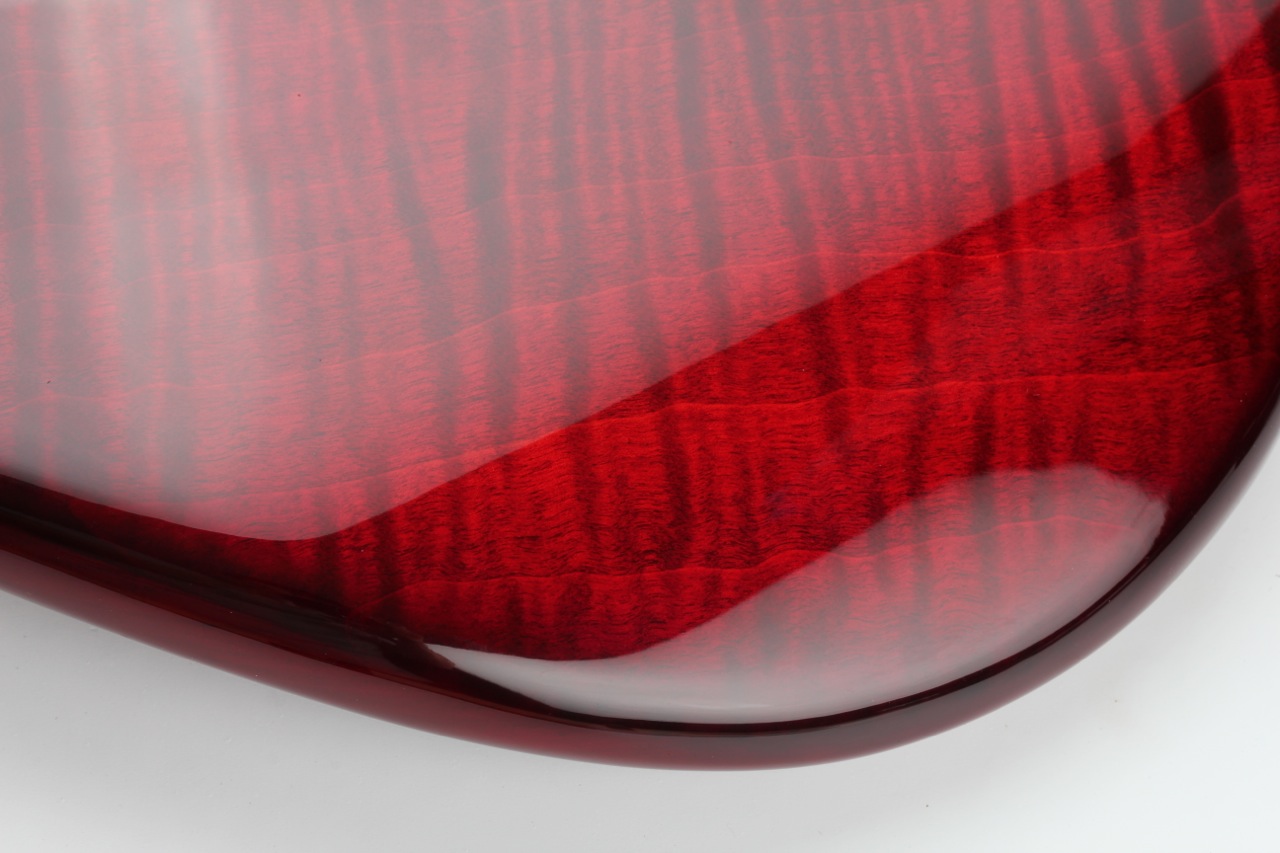
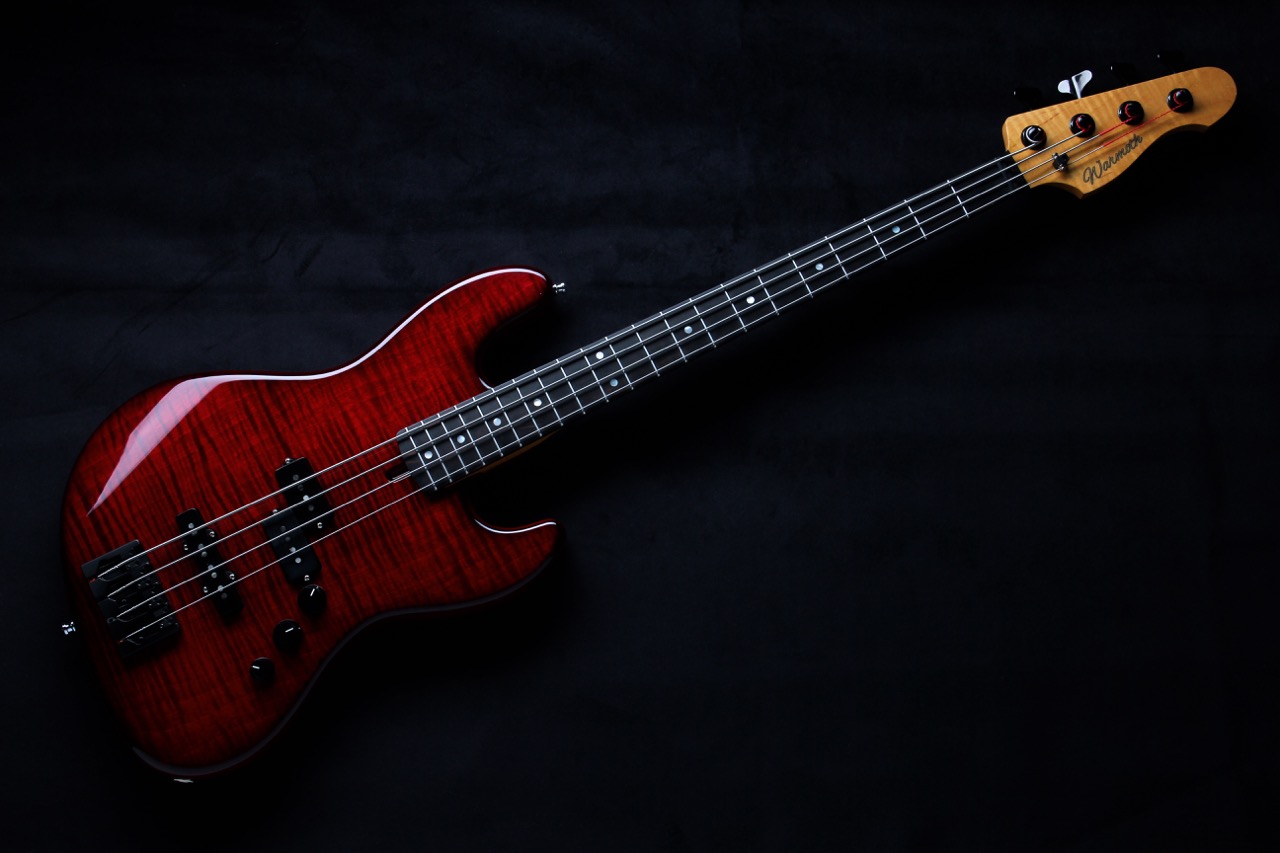
To make this one a little special I selected a flame maple top on a chambered swamp ash body, hoping to get both a beautiful top combined with manageable weight and good tone. I went with a red dye and transparent red back finish. For some reason after ordering it the details showed transparent red finish for both top and back. This was quickly resolved with an email to Warmoth who said that a charge for the dye would appear on my account once it was changed.
It's a gamble no matter how much planning you put into it. You just never know how you'll feel about an instrument until it's in your hands in completed form. Think about all the instruments you've pulled off the rack before you find "the one" that superficially isn't too dissimilar from the others.
Neck
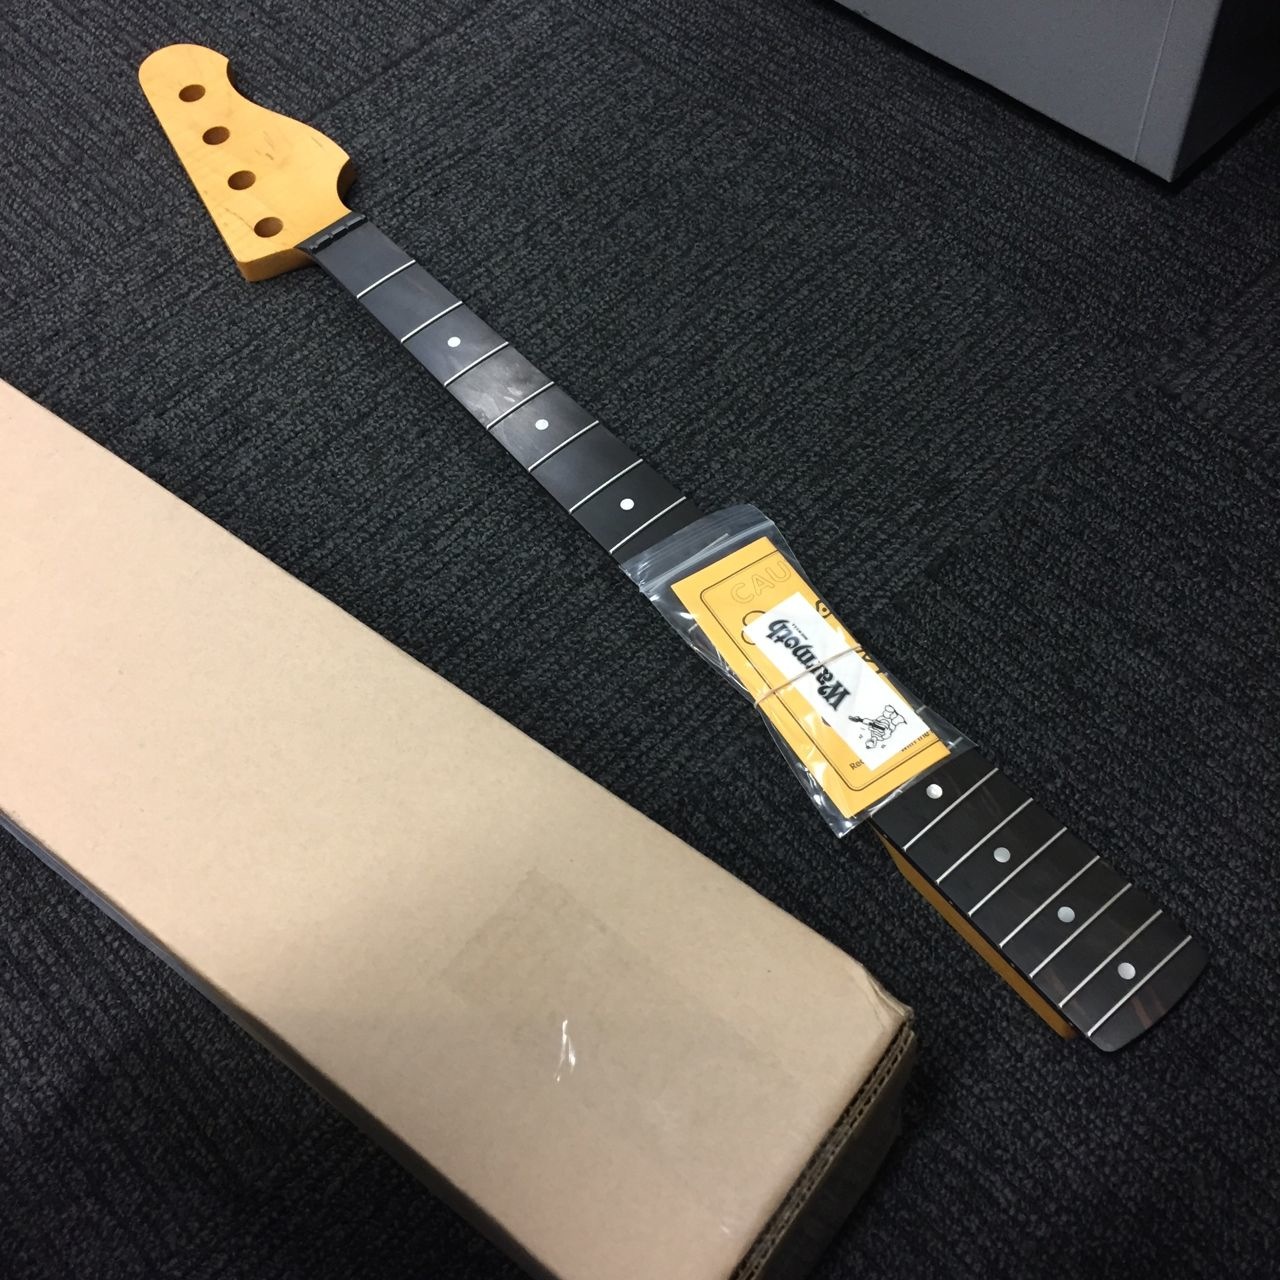
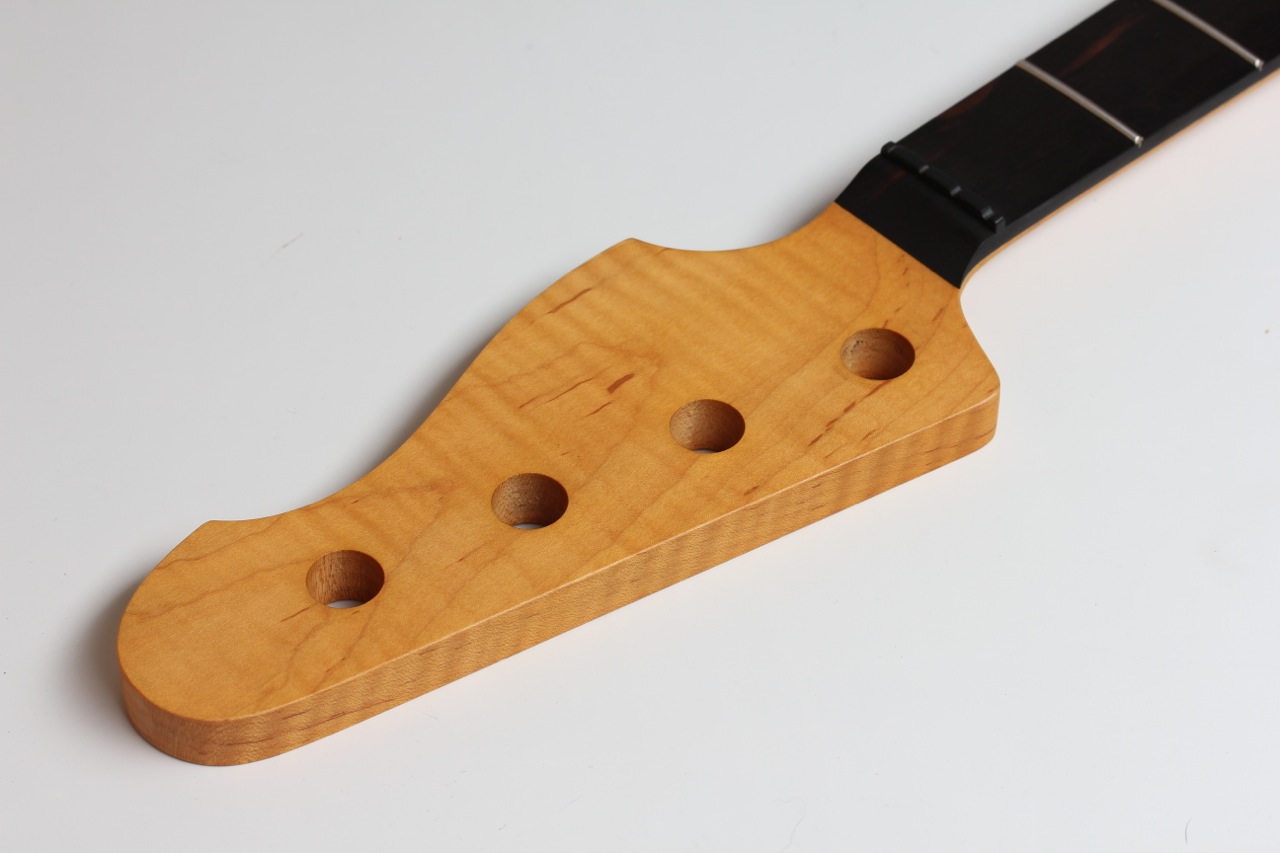
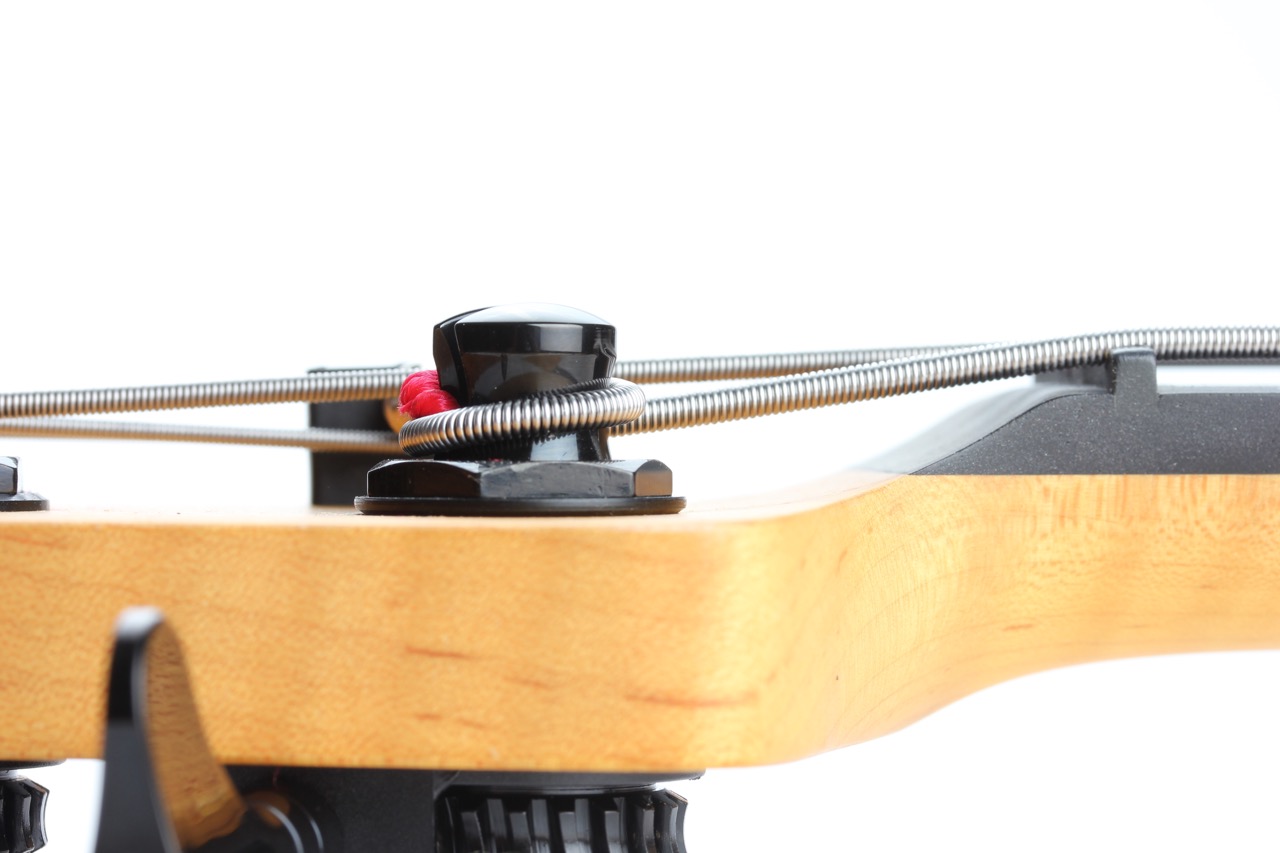
The following day on the 12th of December I ordered a Warhead 32" scale flame maple neck with ebony fretboard from stock customized with SS6150 stainless frets, a GraphTech black nut and vintage tint satin nitro finish. Keeping with the black on red theme I got Schaller BML Light black tuners and a black T roller string retainer.
Surprisingly, the neck shipped the day after Christmas and was in my hands when I arrived back at work on the 4th of January.
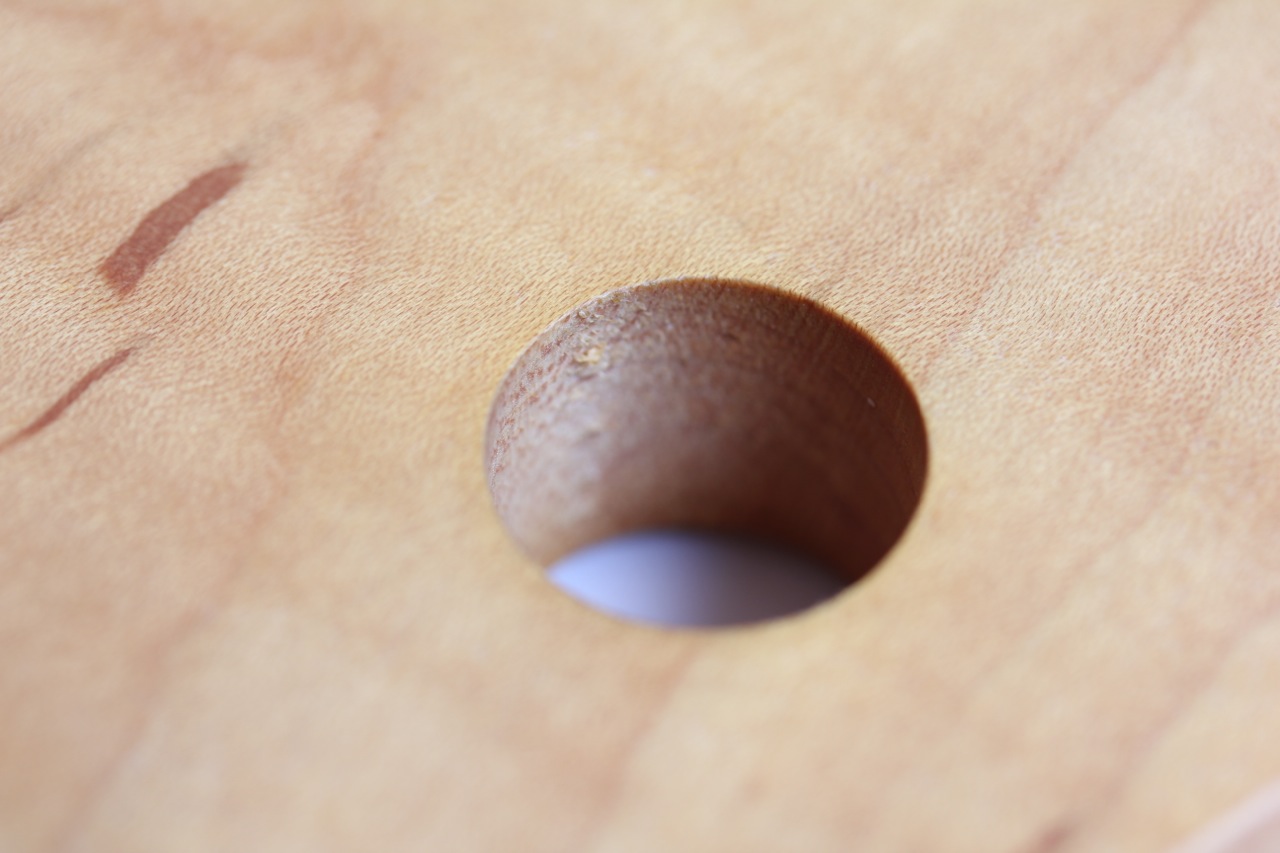
Though the tuner holes may have been drilled for the Schaller tuning keys there would inevitably be some buildup of the finish inside the holes.
This buildup of finish meant that the thrust bearings would not fit the holes as received. Fortunately, I own a rotary file well-suited for the task of enlarging the holes while keeping the walls of the hole parallel. A spindle sander would probably work too.
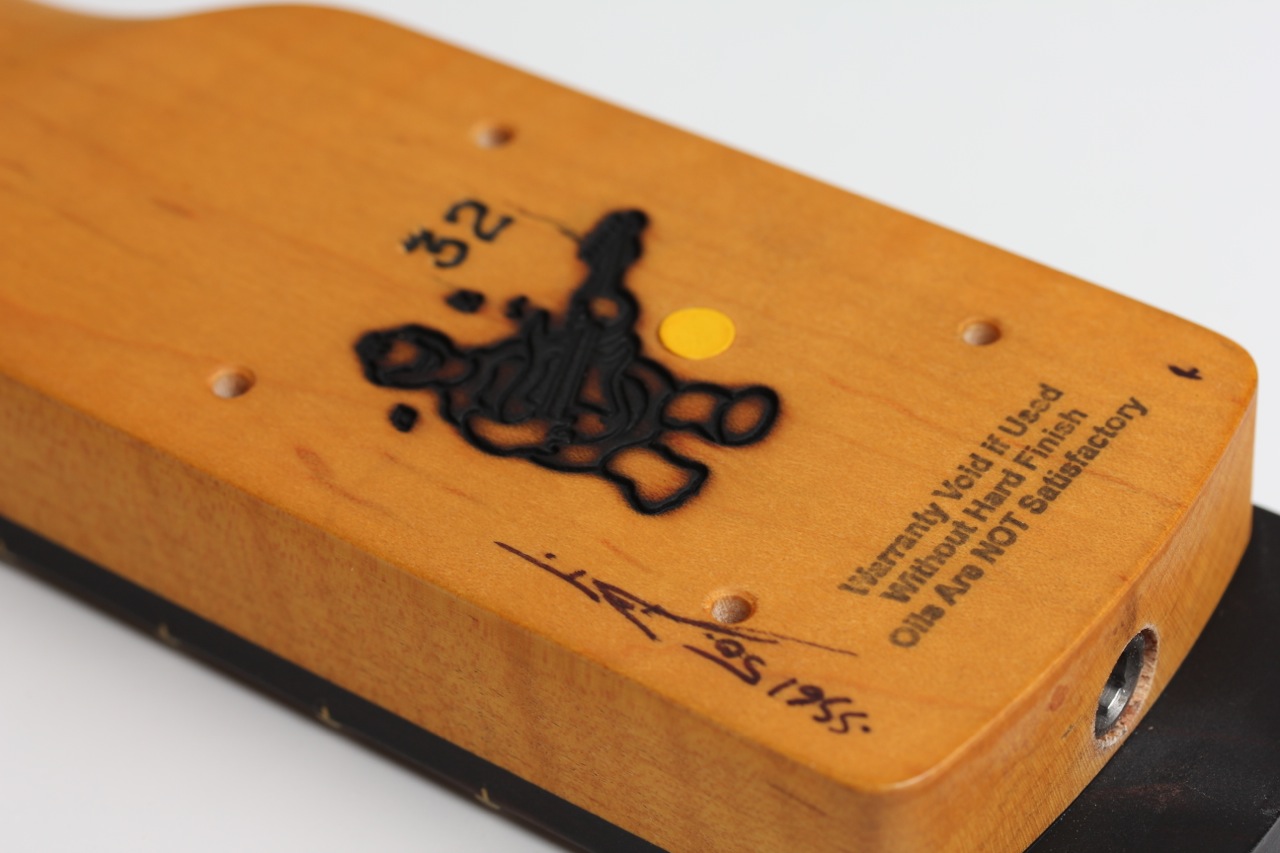
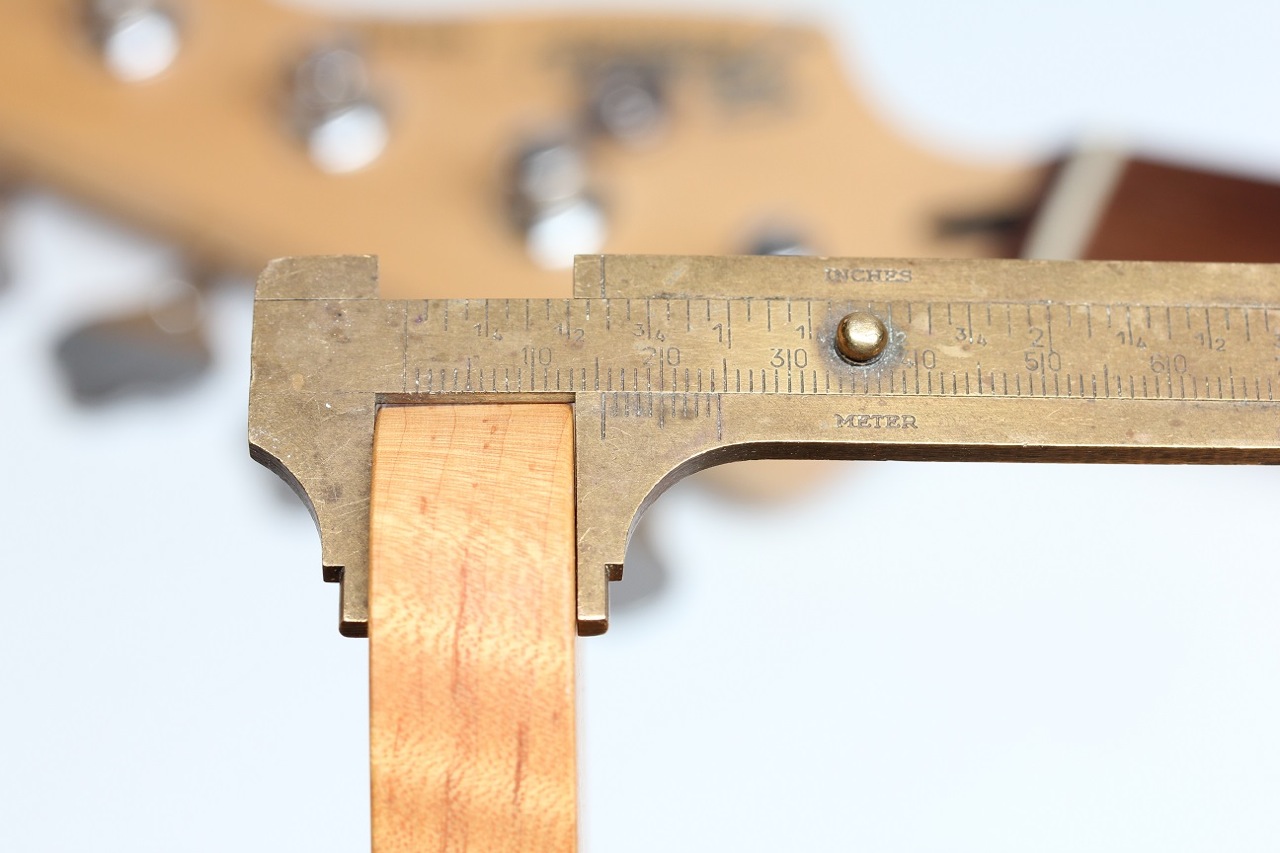
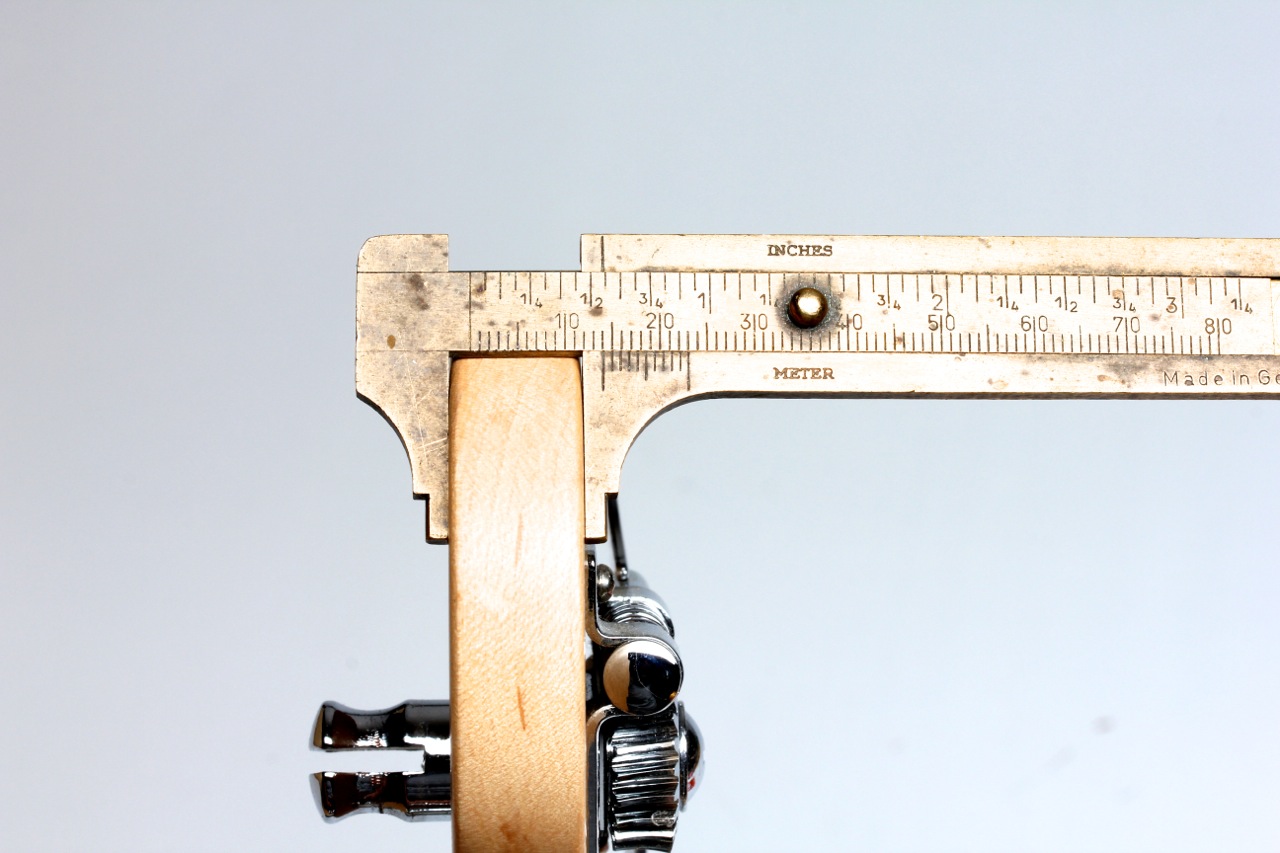
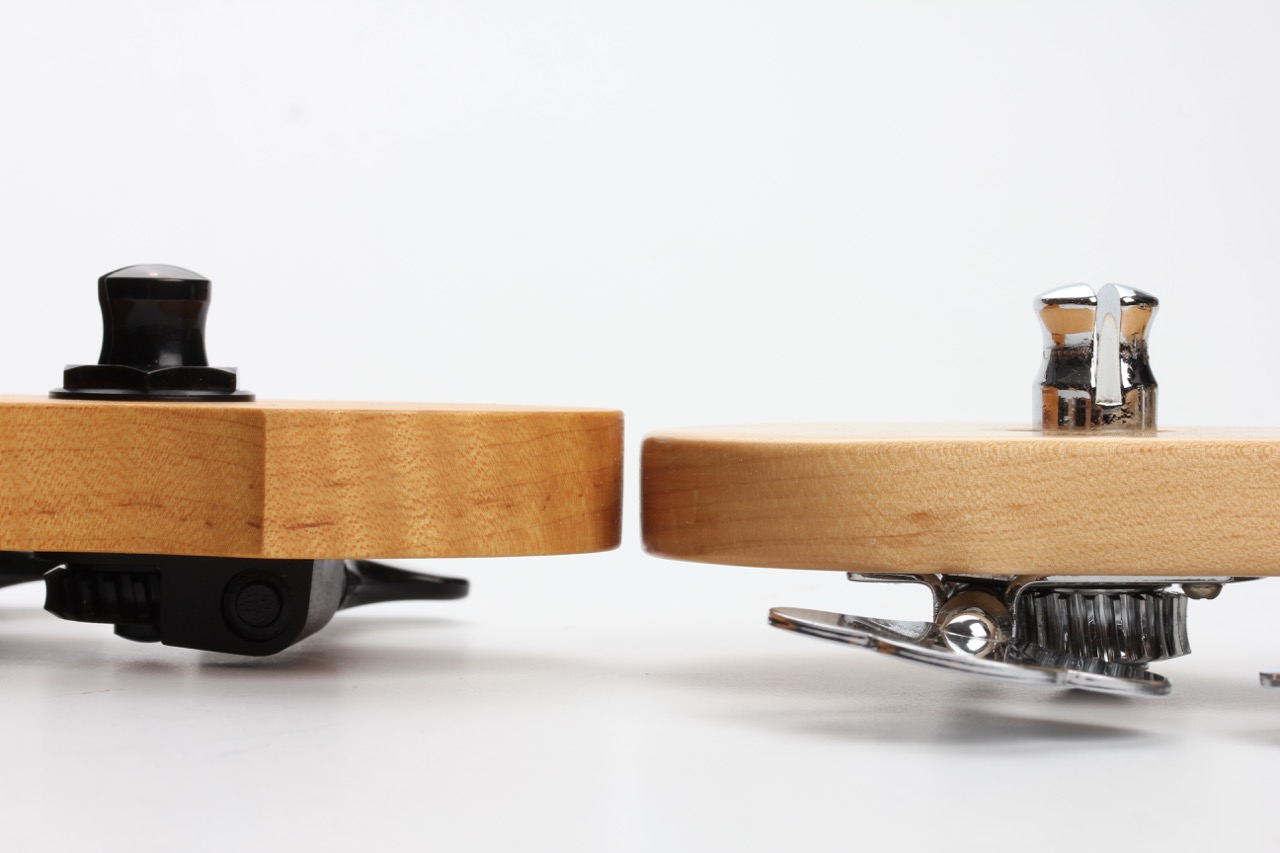
More concerning, however, was the thickness of the Warhead headstock that measured nearly 5/8":
A made in Mexico Fender Jazz neck measured slightly less than 9/16":
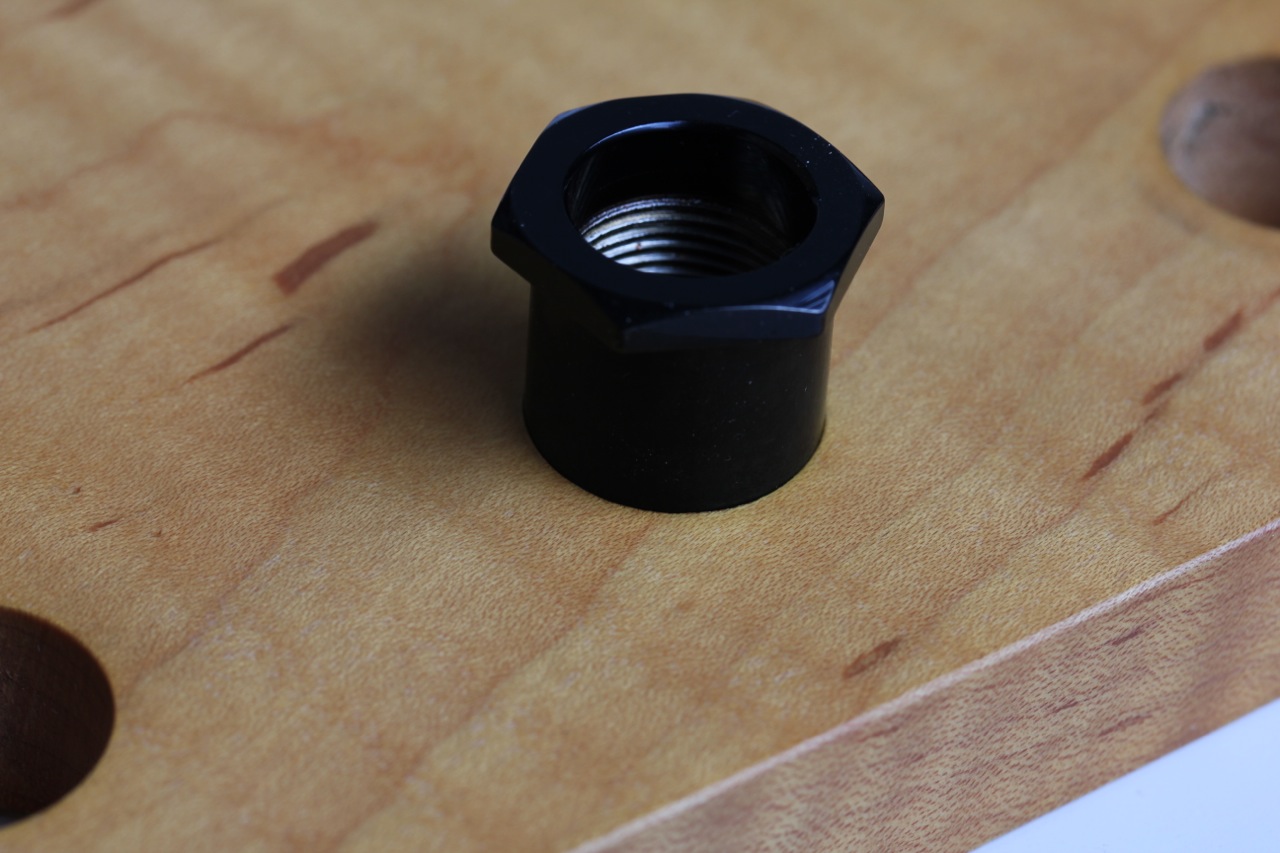
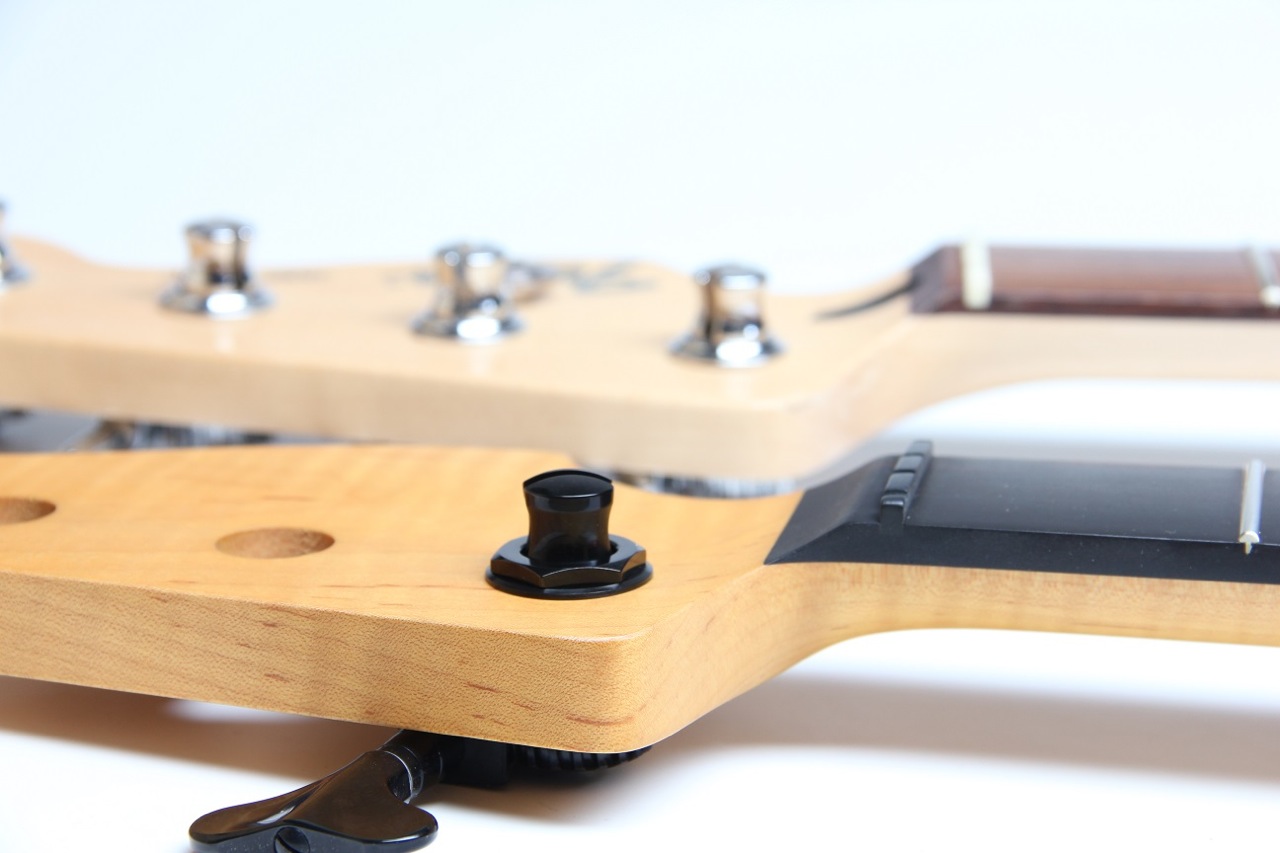
The result is that once the tuners were fitted the tuning posts did not fully clear the thrust bearing:
Note how the Fender's tuning post's widest portion clears the ferrule on the Jazz Bass neck:
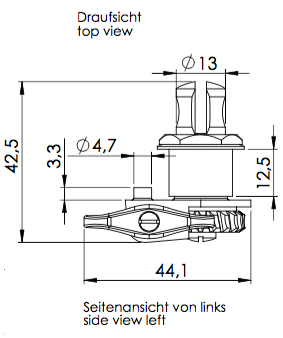
Schaller's drawings show the sleeve of their thrust bearing measures 12.5mm with a small gap between it and the body of the gear housing. The Warhead 32" scale has a 15.5mm headstock thickness.
I wrote an email to Warmoth and received a reply that finish in and around the tuning holes would need be removed before the tuners would fit. I hadn't mentioned the holes as I had already sorted that issue out. Later, Warmoth confirmed that the headstock thickness was normal. Strange to think that a shorter scale would need a thicker headstock. They advised to use short scale strings to avoid string wrap from contacting the top of the thrust bearing. I was concerned that the black finish would potentially get scratched.
Decal
Though I like their products so far I'm not fond of the Warmoth name - a concatenation of two things I don't particularly enjoy (I know it's someones surname). But I especially think the logo in their Dracula font looks somewhat juvenile. So using tips from Nerkoids' thread on Talkbass I made a few test decals:
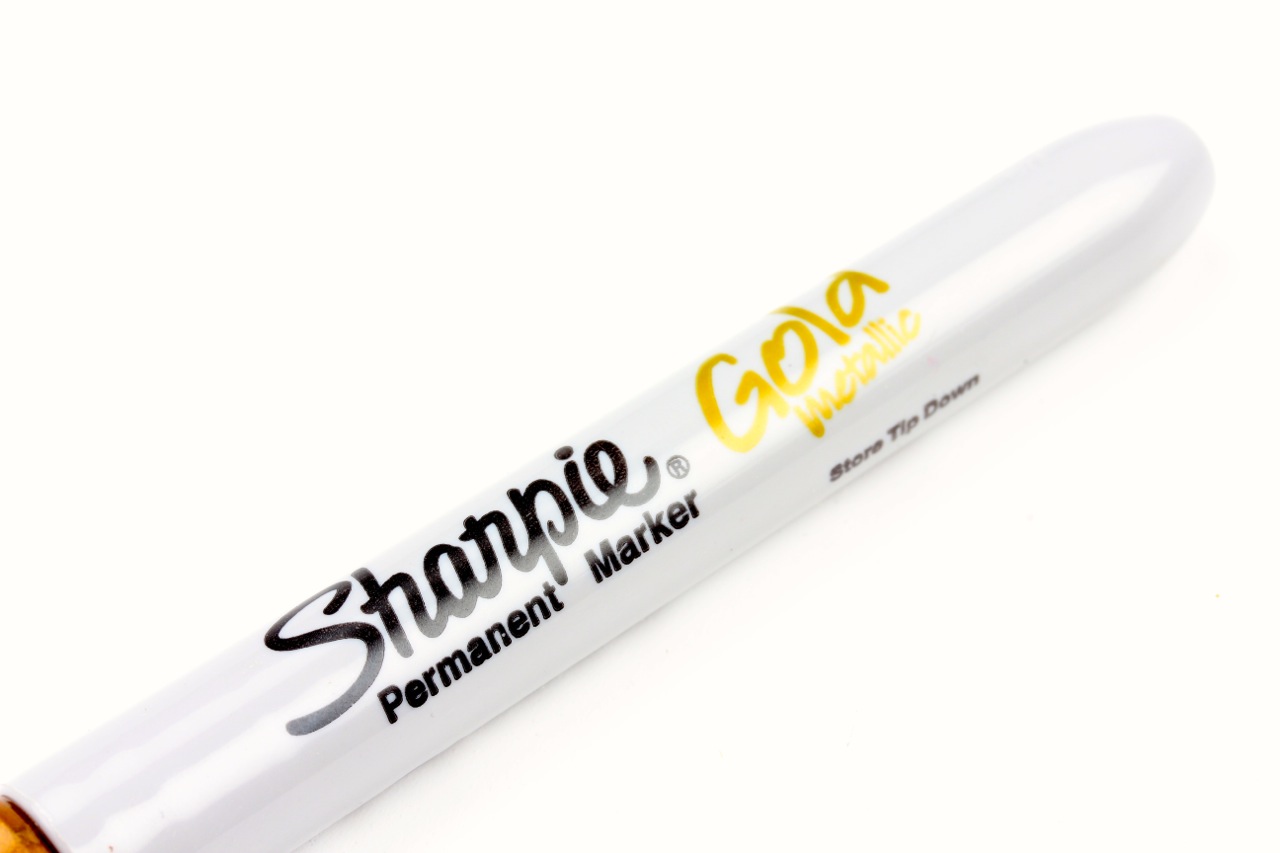
I used Mizpah brand laser waterslide decal paper printed on a color laser printer. For the one with metallic fill I used Sharpie Metallic Fine Point Permanent Markers but not the oil based ones Nerkoids recommended as I could not find them locally. The Elmer's are available from Amazon as reported but the supplier does not ship to Australia. I found these at the supermarket:
The logo was printed in reverse, infilled with the marker then simply soaked and applied so there was no immediate interaction with solvent sprays.
Following application I used a solder rework hot air tool set at around 100C to "set" the decal. Then I used this locally available product chosen admittedly because it was the cheapest product on the shelf and because none of the products suggested by Nerkoids are available in Australia AFAIK:
The traditional look is still the best:
Pickups
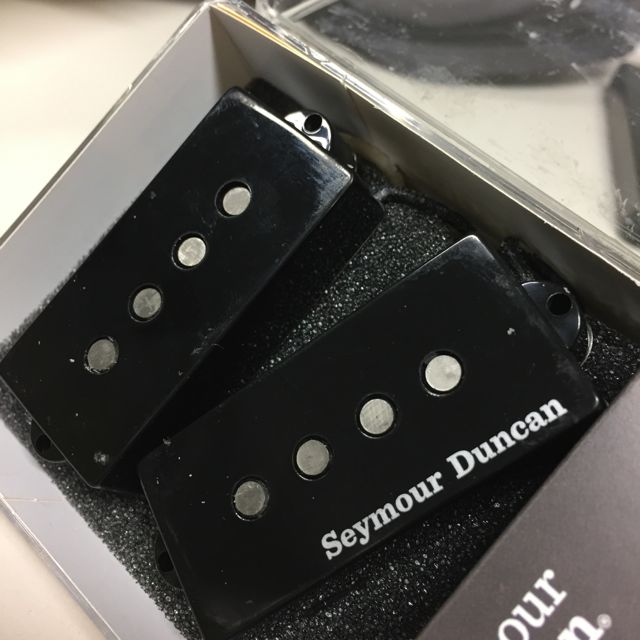
The number of pickup manufacturers has grown since the early days of aftermarket replacements. Now, decision making is that much more difficult. I considered the idea of using one of the newer brands. But I already had a large number of jazz pickups in my drawer so I picked something I thought might be a good match. I settled on a Duncan SPB-1 that will mate with a Duncan Vintage Jazz bridge pickup.
When it arrived the packaging didn't look too promising:
Once opened my fears were confirmed - the covers were abraded at each corner. I suspect that vibration during shipping caused friction between the shiny pickup covers and the clear plastic box. It's a shame they do not put a peel-off sticker over the covers.
Warmoth wanted me to return the entire pickup for replacement (wasn't convinced the new one wouldn't suffer the same fate) so on their advice I contacted Seymour Duncan. It wasn't until later that I remembered that I had contacted them once before about another issue and also never heard back. So I just bought new Chinese covers from Ebay (with no advertising printed on them).
24 January 2017
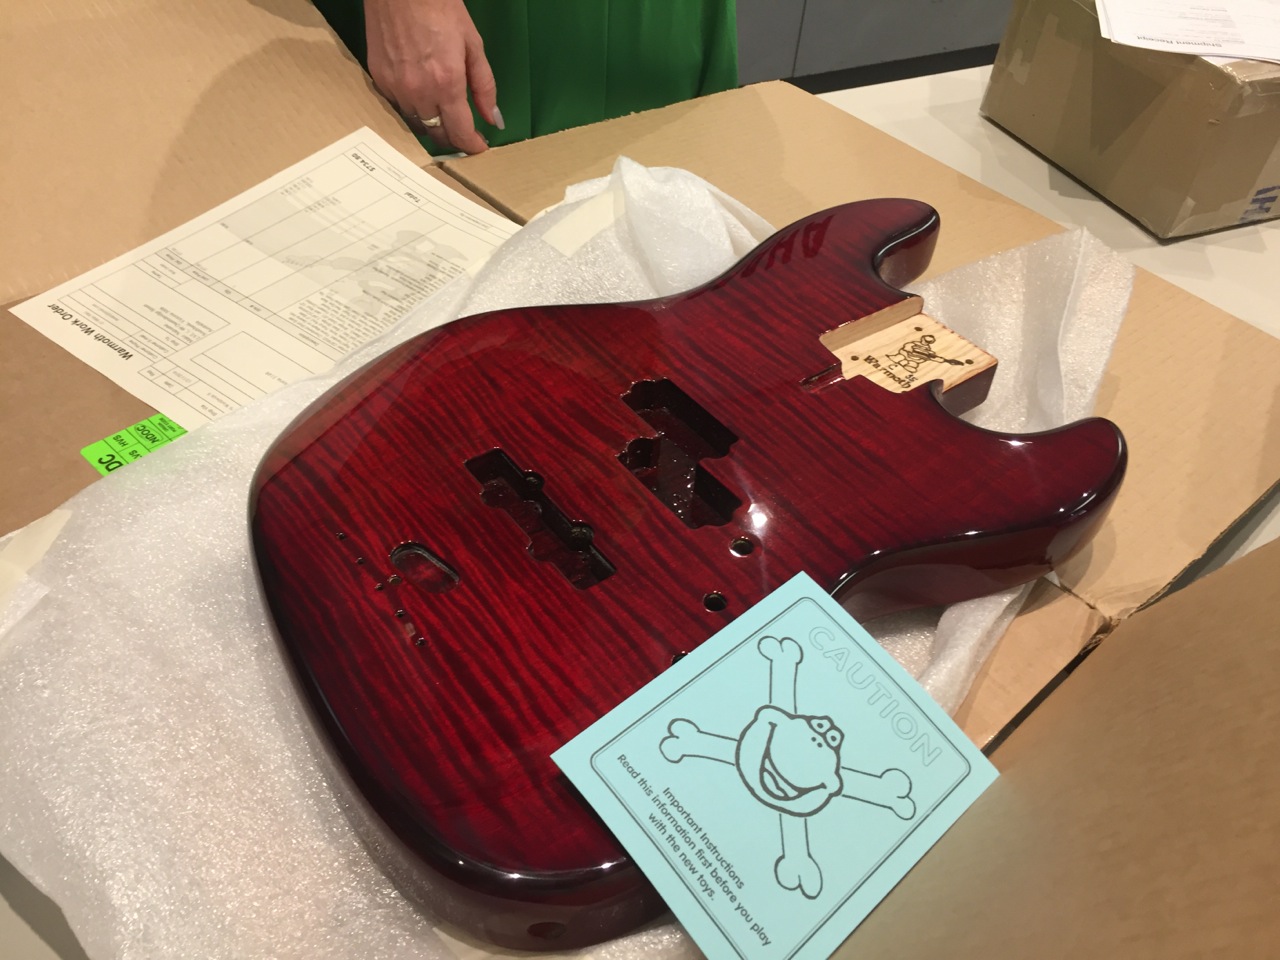
On the 23rd of January my body showed up:
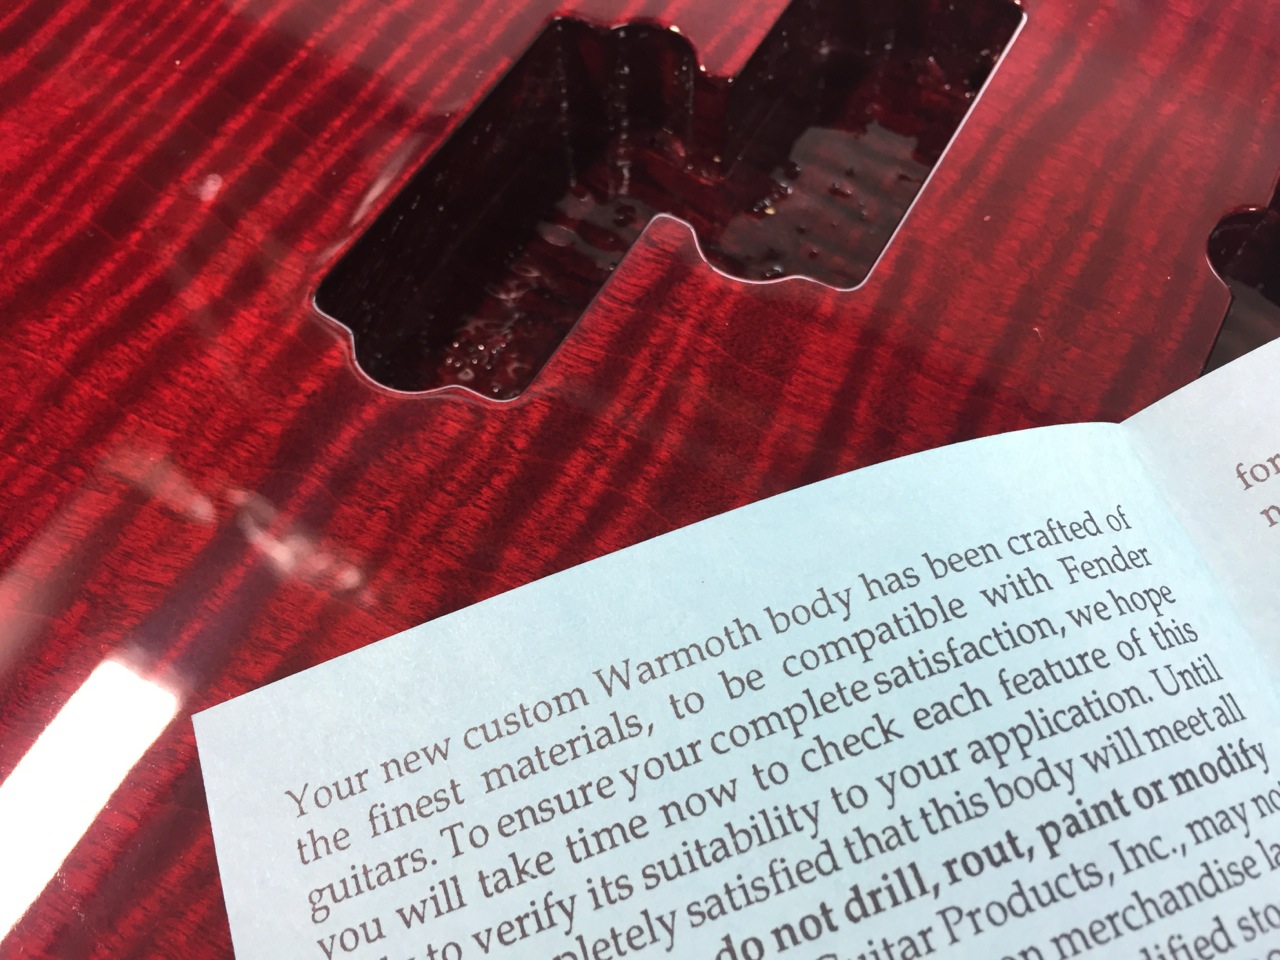
Inside was a note saying that it was compatible with Fender guitars. Unlikely since their site said that the neck pocket is a not compatible with other brands or manufacturers.
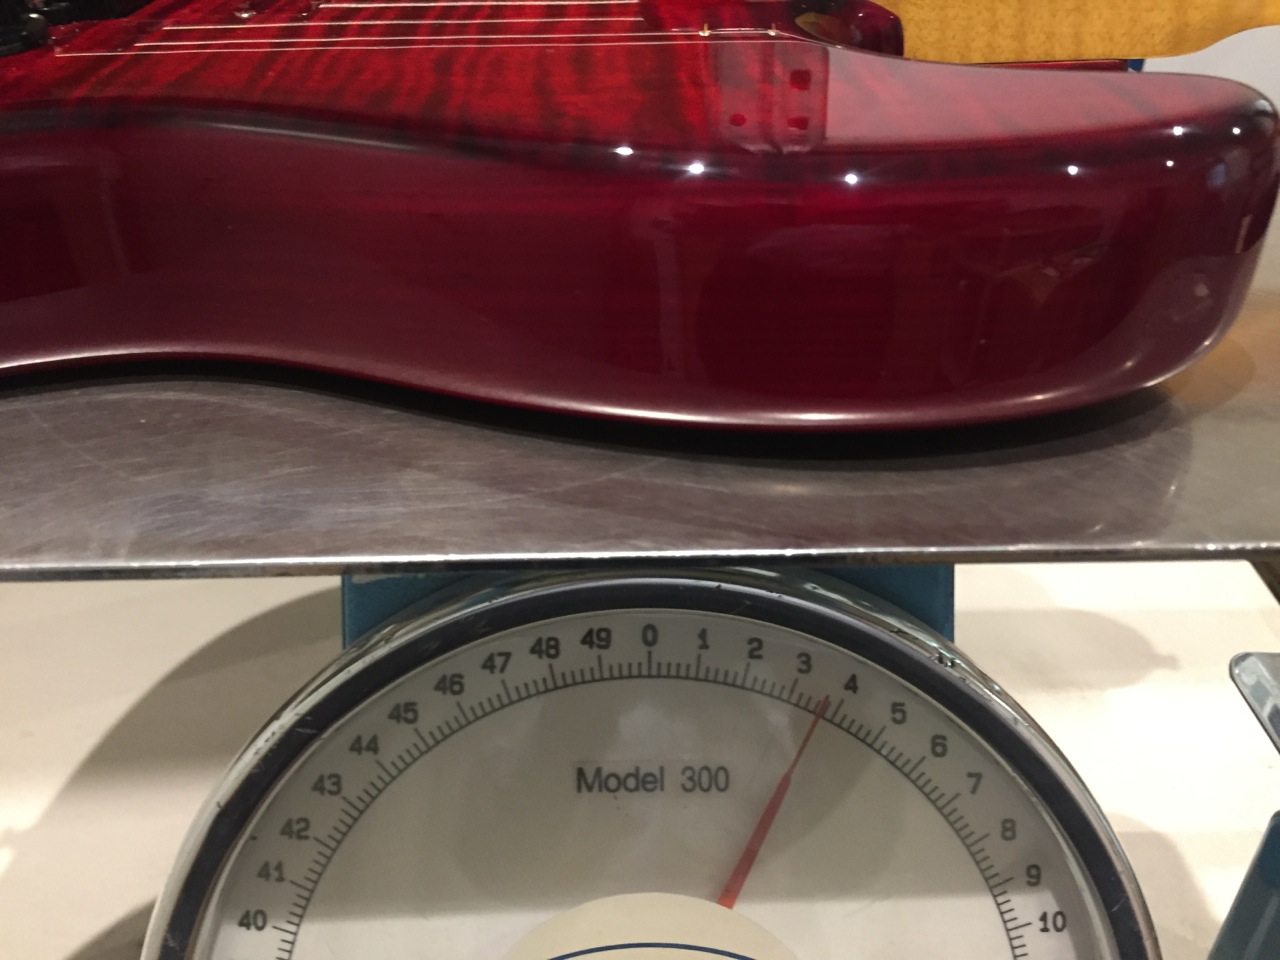
Chambered swamp ash with a flame top resulted in a very lightweight body:
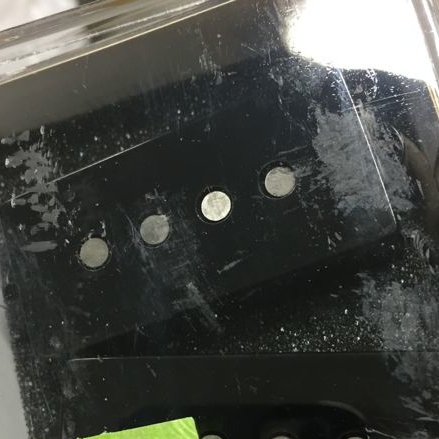
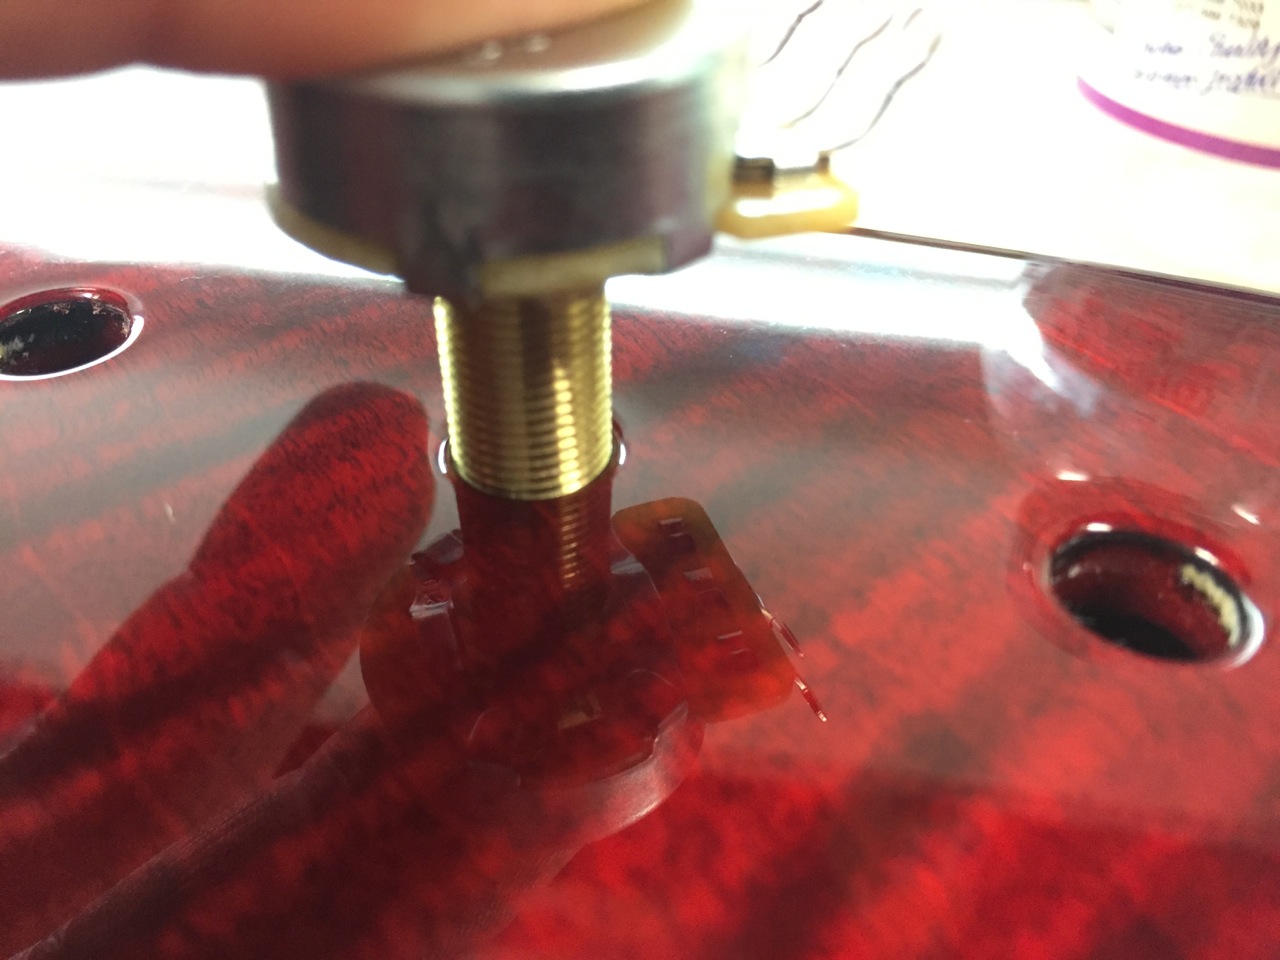
Similar to the neck tuner holes, the control holes would not accomodate the shaft of the CTS pots due to a buildup of finish. I used a stepped drill bit from the outside then a straight bit from the back to clean out what the stepped drill couldn't reach.
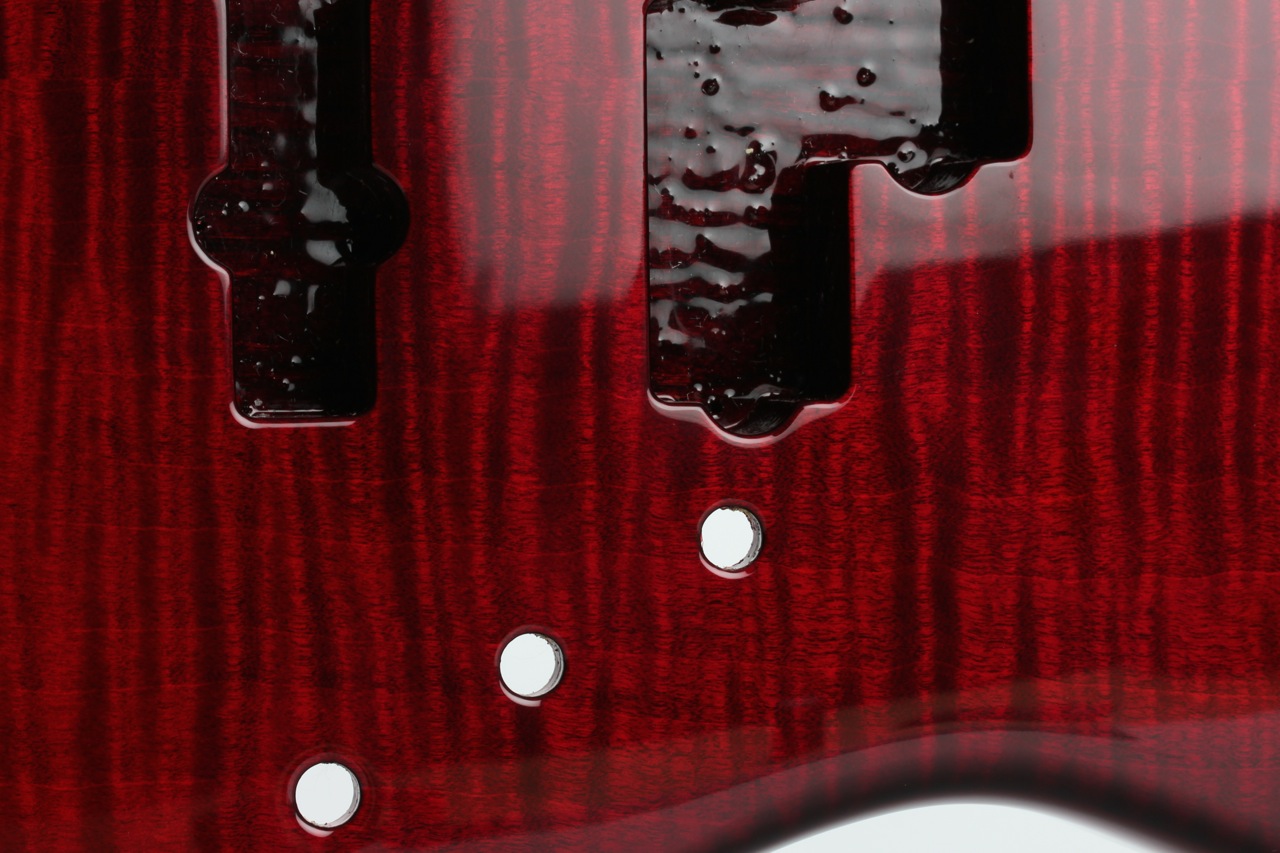
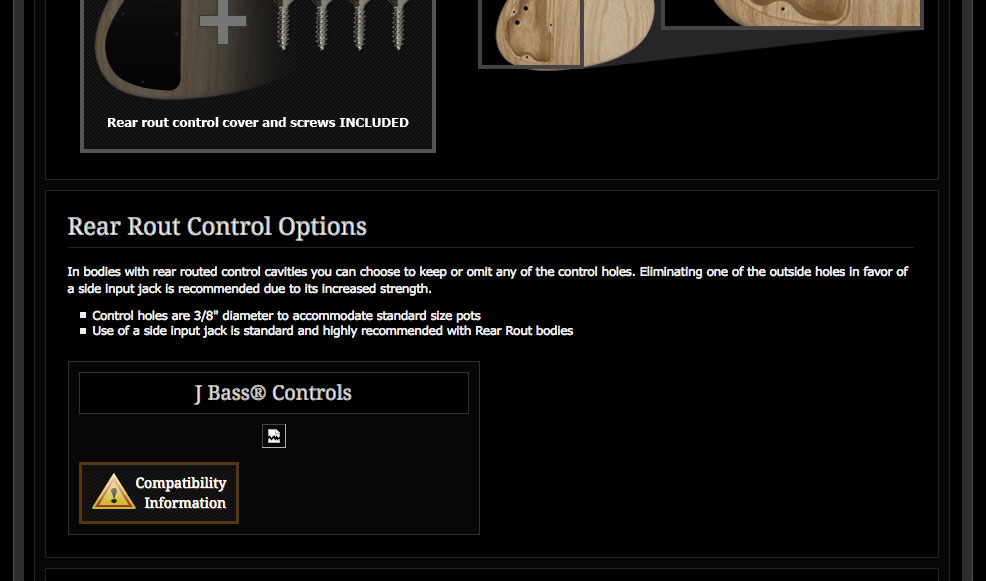
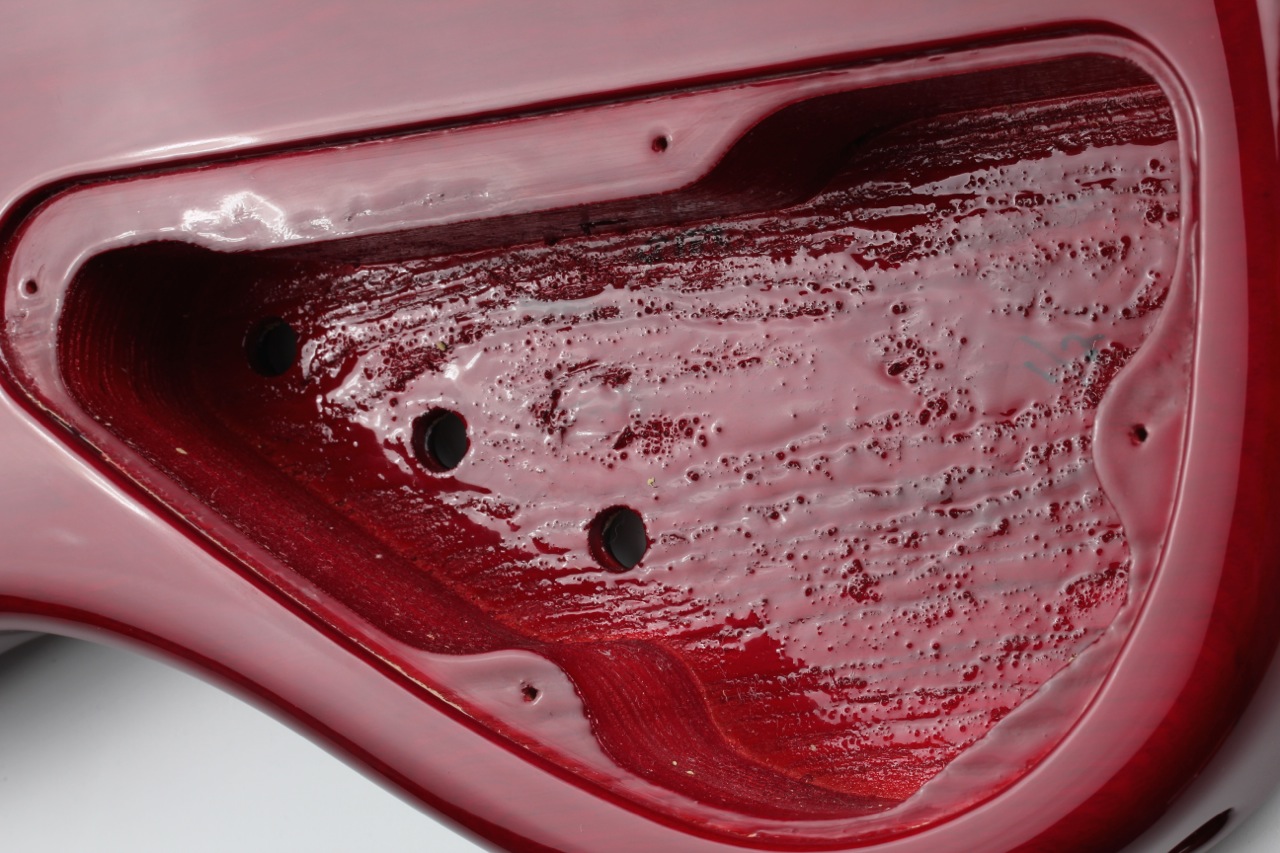
The first volume pot hole was disturbingly close to the P pickup rout. Since I opted for a side jack it probably would have been better to go with a V - T - INPUT scheme. Unfortunately many of the image links on the Warmoth site are broken as of this writing including the one that shows the control rout options.
An image that wasn't broken but I mistakenly thought did not apply (even though the image clearly shows red) was the "custom burstover" finish. Since I went with red dye and transparent red back finish I thought they would not transistion through such a dark color. I've never been a big fan of burst finishes so would have opted for the "clean line" option had I known ahead of time.
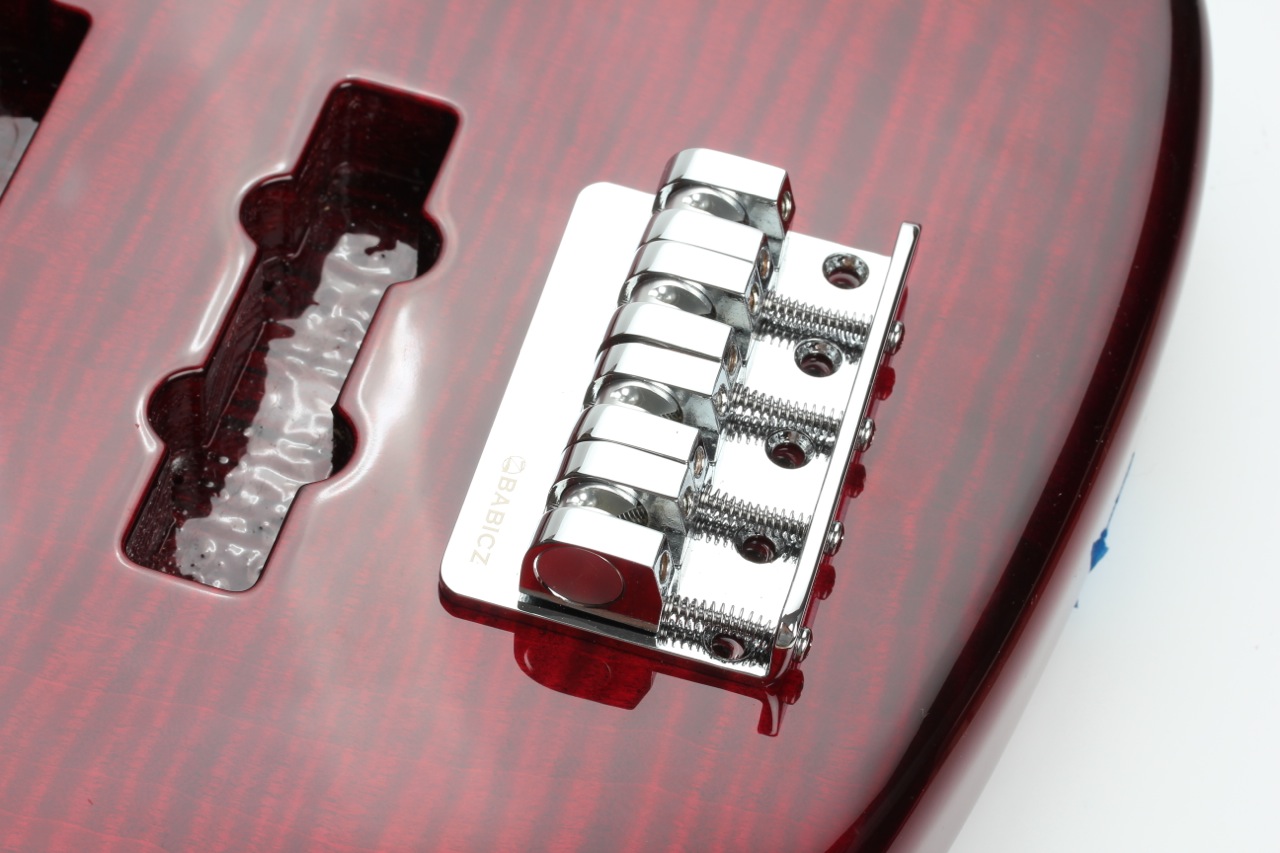
I was a little indecisive about the bridge but knew that I'd go Fender mount since the body was drilled for the Gotoh 201 that has the same hole pattern. Full Contact Hardware was offering a free t-shirt with purchase so I went with them. But there was no option to add shipping to Australia nor a comment about the t-shirt via the new Paypal page so I sent them an email.
They responded by saying I'd receive a separate Paypal bill for shipping. 19 days later a bill arrive that I paid immediately. When the bridge arrived there was no t-shirt. I wrote to them asking where the shirt was but never received a reply. I guess they knew I'd never wear it - everyone knows their logos are too prominent on their products anyway.
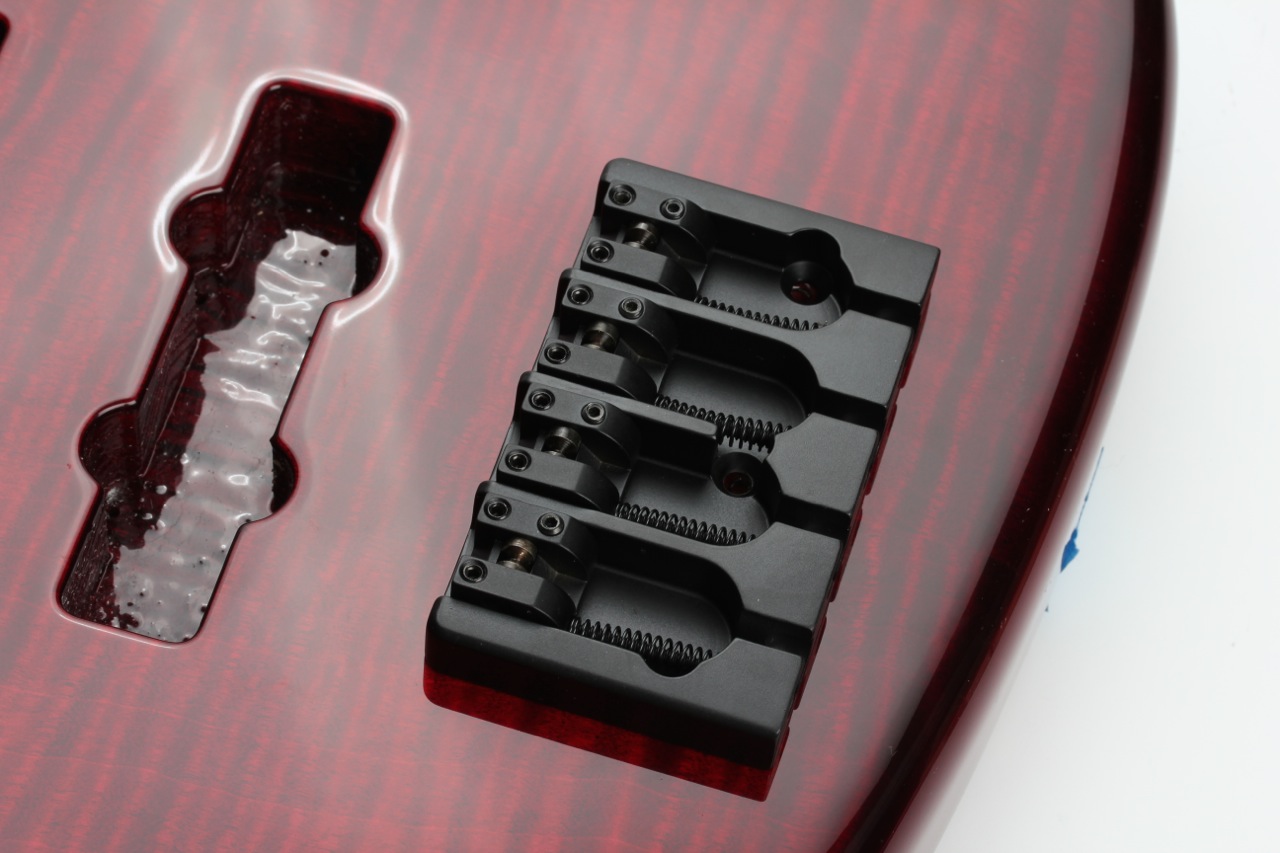
Seemed like black might have been the way to go so I also ordered a Hipshot A Style Fender mount bridge in aluminum from Best Bass Gear. I had some concerns when the tracking showed that the package had been last seen in Miami nine days prior, but it unexpectedly showed up the minute I sent an email to them.
The picture doesn't show it clearly but the finish of the Hipshot is quite a bit more refined. It's also nice that they don't feel the need to put a logo anywhere on their product.
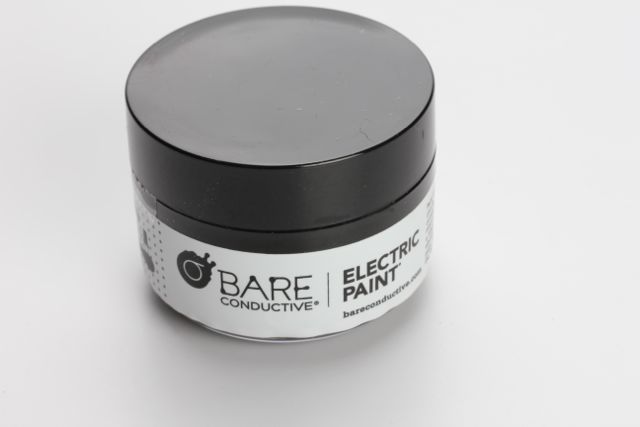
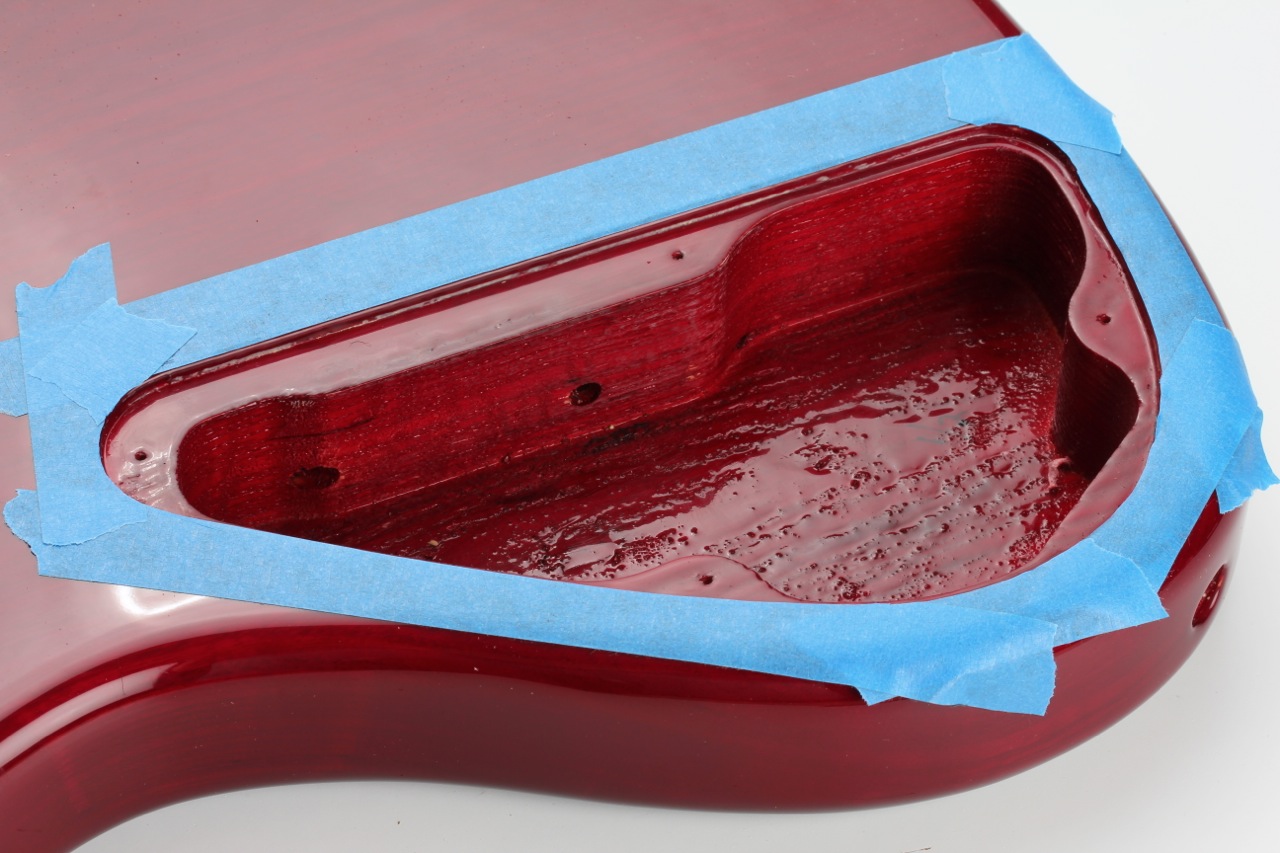
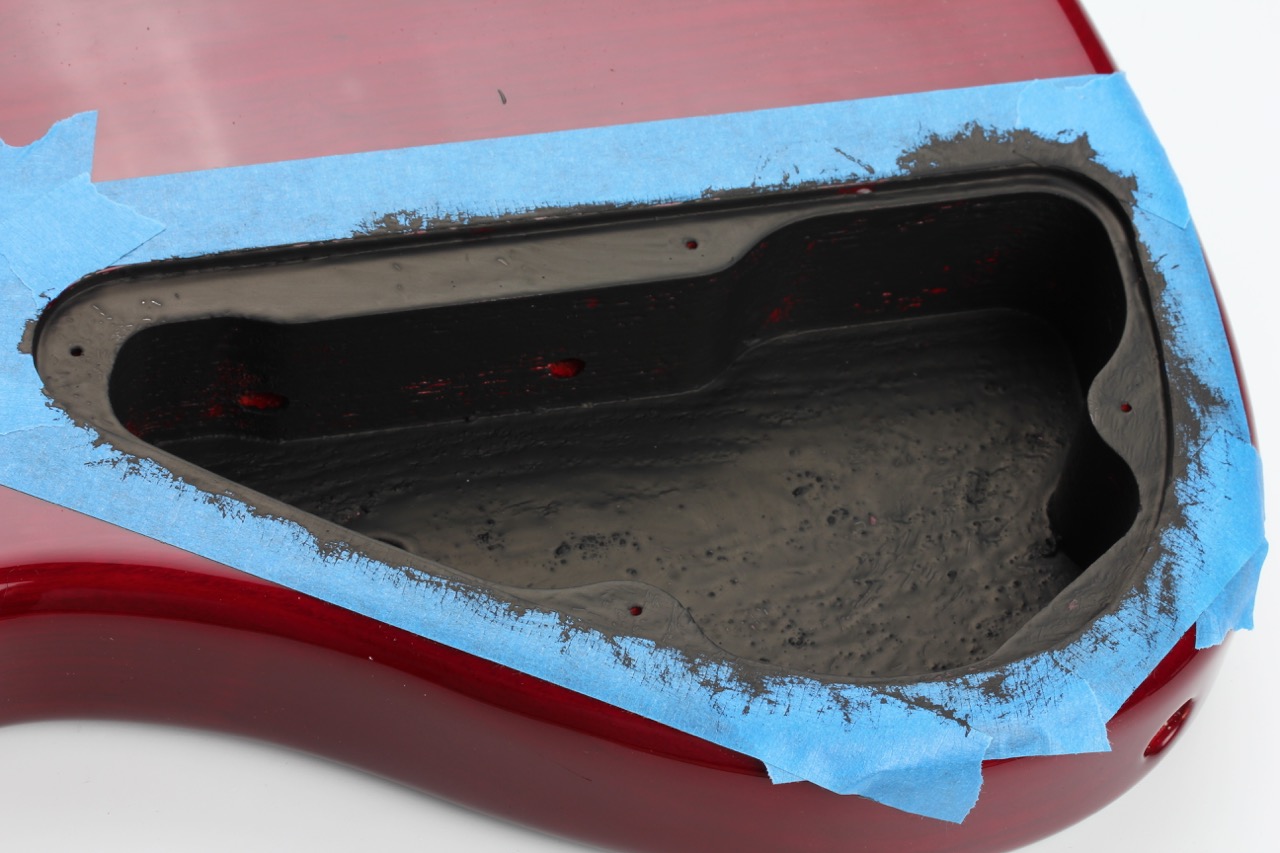
Though I have a big roll of copper shielding tape I like the way my Ibanez looks inside the control cavity. They appear to have used some kind of black conductive paint.
With two coats resistance measured about 100 Ohms per inch or so.
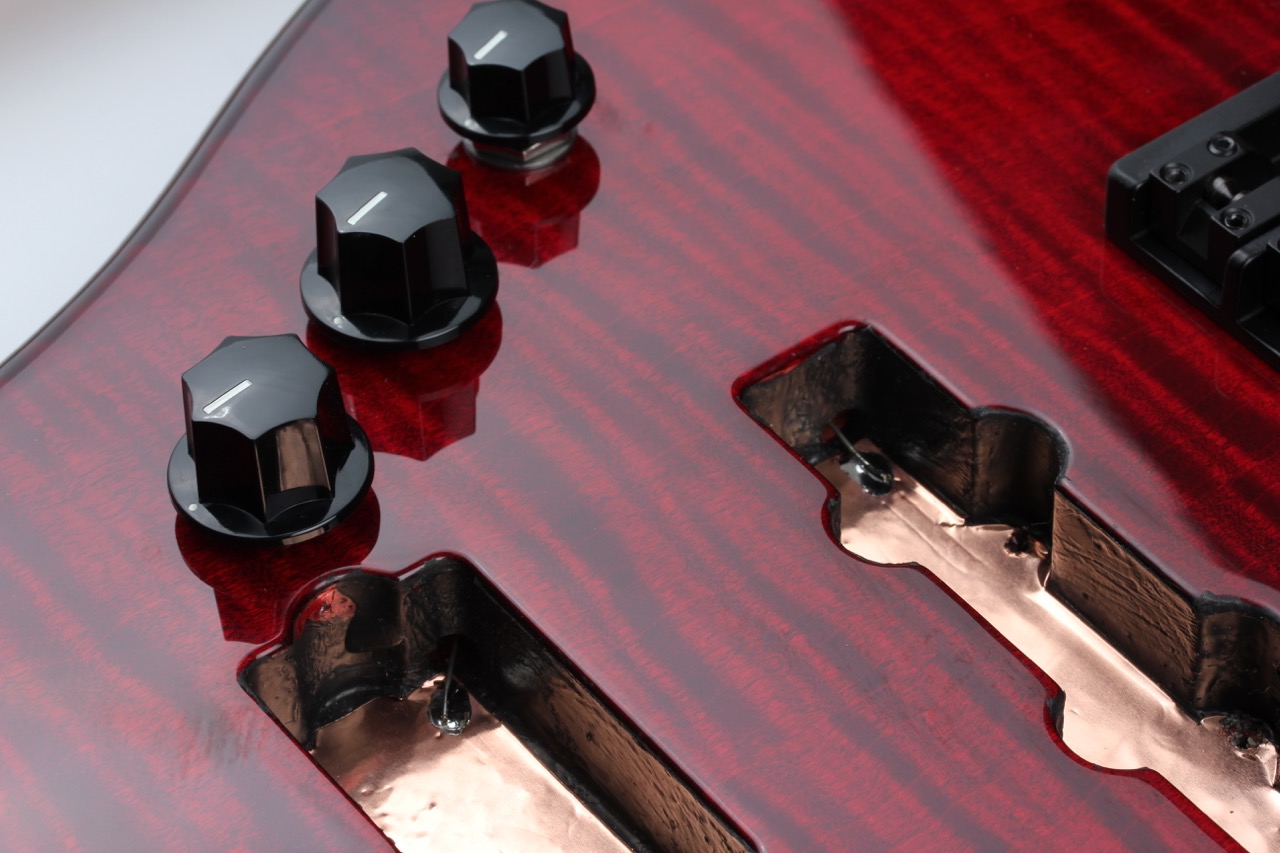
One the conductive paint was done I suddenly realized that there were three pools of shielding with no continuity between them. So I laid copper tape with conductive adhesive to the bottom of each pickup rout. Then I soldered a bus wire from each copper land to the related potentiometer body.
When pressing a knob onto these CTS pots make sure to support the rear of the potentiometer body. One knob was a particularly tight fit. The body of the pot came loose when the tabs that hold it to the bushing bent from the force.
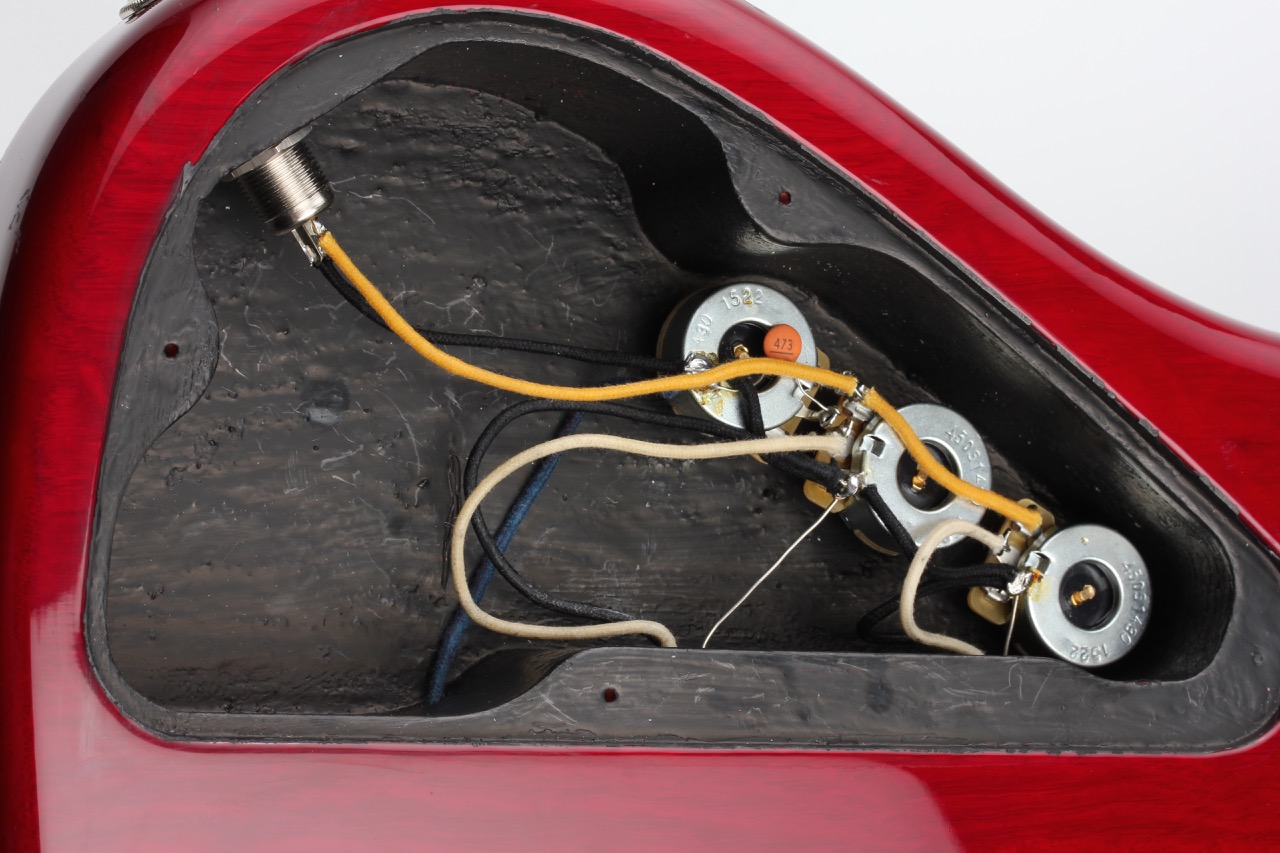
The control cavity gained continuity via each potentiometer body and the 1/4" jack. I left some excess wire on the pickups in case they did not meet my expectations.

![]()
![]()
![]()
![]()